How to record screen on Mac with audio, including system sound
How to record screen on Mac with audio: use Shift-Command-5 for your mic, and see how to capture system sound on macOS 27 or with an app on older macOS.
To record your screen on a Mac with audio, press Shift-Command-5, click Options, choose a microphone, then click Record. To also record the Mac’s own sound (system or internal audio), choose Include System Audio in the same Options menu, which Apple added in macOS 27 Golden Gate. On macOS 26 Tahoe or earlier, the built-in tools record only the microphone, so you need an app such as OBS (free) or MacMuse Recorder.
We checked these steps against Apple Support on November 10, 2026. Apple’s article How to record the screen on Mac was last published on September 14, 2026, and the Mac User Guide we read was the macOS 27 Golden Gate edition.
What can the Mac’s built-in tools record?
macOS has two built-in ways to record the screen: the Screenshot toolbar and QuickTime Player. On current macOS, QuickTime’s New Screen Recording command opens the same Screenshot toolbar, so in practice they share one set of options.
| What you want to capture | macOS 26 Tahoe and earlier | macOS 27 Golden Gate and later |
|---|---|---|
| Whole screen or part of it | Yes | Yes |
| One window | Only in macOS 26 Tahoe | Yes |
| Your voice (microphone) | Yes | Yes |
| System audio (sound from apps, browser, videos) | No | Yes, with Include System Audio |
| Camera, zoom effects, editing beyond trimming | No | No |
So the answer to “can a Mac screen record with sound?” is yes for your voice on any recent macOS. For the Mac’s own sound, it depends on your macOS version. To check yours, choose Apple menu > About This Mac.
How to screen record on Mac with sound using Shift-Command-5
These steps follow Apple’s support article.
- Open the Screenshot toolbar. Press Shift-Command-5. You can also search for Screenshot in Spotlight.
- Pick what to record. Click Record Entire Screen, Record Selected Window (macOS 26 Tahoe or later), or Record Selected Portion. For a portion, drag the frame’s edges to resize it.
- Click Options. The menu shows recording settings.
- Choose a microphone. Under Microphone, select the mic you want so a checkmark appears. Choose None to record without your voice.
- Turn on system audio (macOS 27 or later). Choose Include System Audio to record the sound your Mac plays.
- Set the rest. Choose Show Mouse Clicks to draw a circle where you click. Set a timer if you want a countdown. Pick a Save to location. By default, recordings go to your desktop.
- Start recording. Click Record. If you chose a window, click that window.
- Stop recording. Click the Stop button in the menu bar, or press Command-Control-Esc.
A thumbnail appears in the corner of the screen. Click it to trim the recording, or wait and it saves. The file is a .mov named “Screen Recording” with the date and time.
How to record your screen with audio in QuickTime Player
- Open QuickTime Player from your Applications folder.
- Choose File > New Screen Recording, or press Control-Command-N.
- If the Screenshot toolbar appears, follow the steps above. That is what you will see on current macOS.
- If a separate Screen Recording window appears instead, click the arrow next to the Record button and choose a microphone. Use the volume slider to monitor your audio. Lower it or use headphones if you hear feedback.
- Click Record, then click anywhere to record the whole screen, or drag to pick an area.
- Stop with the Stop button in the menu bar or Command-Control-Esc. QuickTime opens the recording so you can play, trim or share it.
Apple’s QuickTime steps mention only a microphone. QuickTime alone does not give you system audio on older macOS.
How to record internal audio on a Mac running macOS 26 or earlier
If your Mac can’t run macOS 27 yet, or you need more than a raw .mov, use an app that captures system audio. macOS controls this with one permission, Screen & System Audio Recording, so any app you choose will ask for it first.
| App | Price | Mic | System audio | Best for |
|---|---|---|---|---|
| OBS Studio | Free, open source | Yes | Yes, macOS 13+ | Streaming, long raw recordings |
| MacMuse Recorder | $19.99 once for 1 Mac | Yes | Yes | Edited demos and tutorials with zoom |
| Cap | Free for personal use | Yes | Yes | Recordings shared as links |
| Screen Studio | $29/month or $9/month yearly | Yes | Yes, all apps or picked apps | Polished demos, link sharing |
Prices checked on November 10, 2026.
Record system audio with OBS (free)
OBS is the best free choice. It is open source and supports macOS 13.0 and newer. Its desktop audio guide says:
- In OBS Studio 30 or later, add a macOS Audio Capture source.
- Choose whether to capture all desktop audio or one app.
- Add a macOS Screen Capture source for the picture. OBS’s sources guide lists it as capturing a display, window or app.
- Add your microphone as an audio source if you want narration.
- Click Start Recording.
OBS has many settings, and it does not add zooms, captions or cursor effects. For a quick tutorial, that can mean more work after recording.
Record mic and system audio with MacMuse Recorder
MacMuse Recorder is our app. It records a display, a window, an area or the camera, with microphone and system audio. Each one is optional, and macOS asks for permission first. It runs on Apple silicon Macs with macOS 15 or later, so it covers macOS 15 Sequoia and macOS 26 Tahoe, where the built-in tools can’t capture system audio.
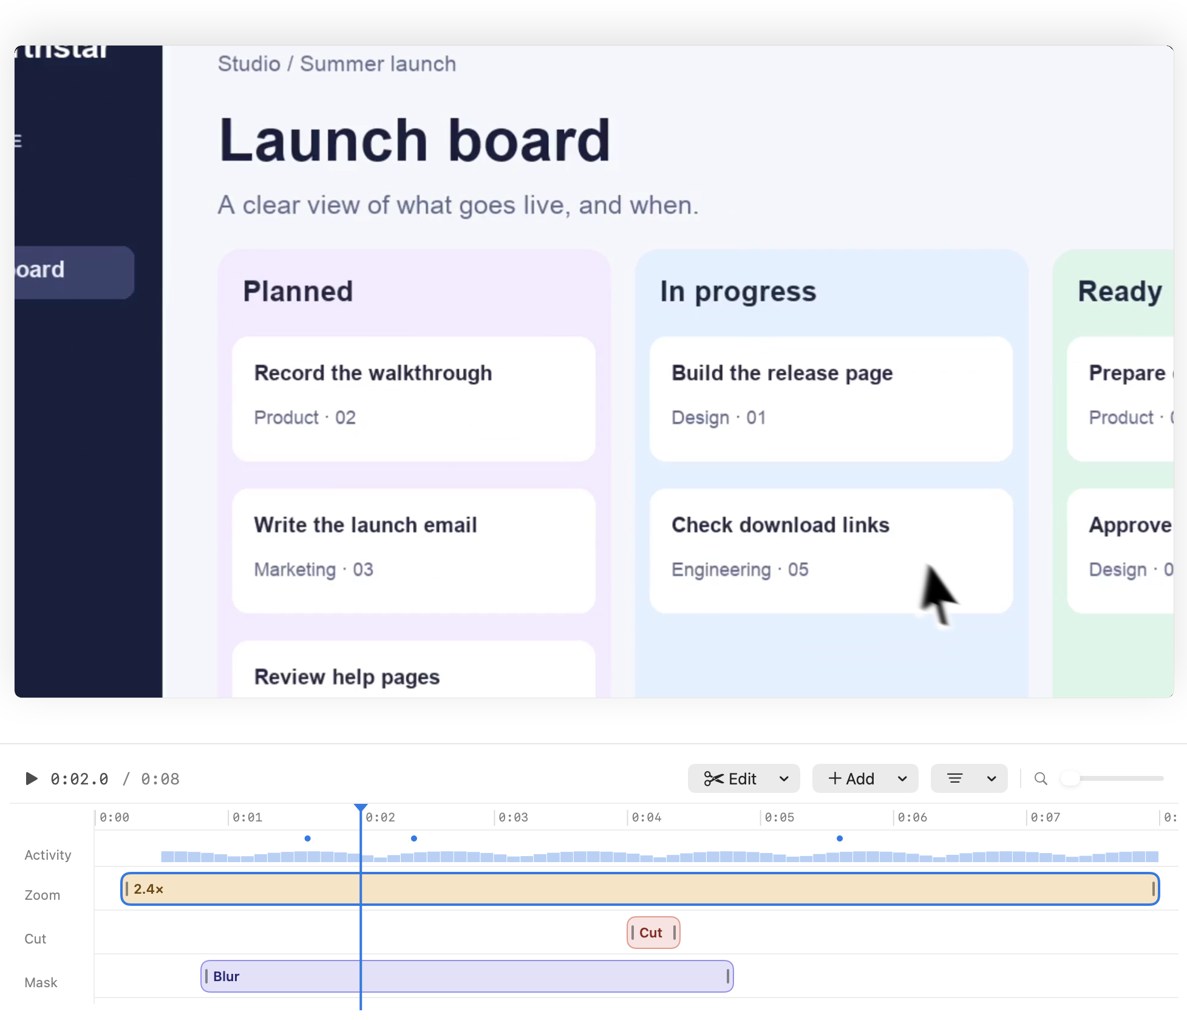
After you record, it opens an editor. It suggests zooms from your clicks, and you can move, retime or delete each zoom. You can also cut pauses, add captions transcribed on your Mac, and blur private parts of the screen. Then export MP4, GIF or ProRes. Recordings stay on your Mac. There is no free trial, and no share links, so use Cap or Screen Studio if you share by link.
For planning the recording itself, see how to record a product demo on a Mac.
Why is there no sound in my Mac screen recording?
Work through these checks in order.
1. Check the microphone setting. Press Shift-Command-5 and click Options. If Microphone is set to None, your voice is not recorded. Select your mic so it shows a checkmark.
2. Check system audio for your macOS version. On macOS 26 Tahoe or earlier, the built-in tools do not record system audio at all. Silence from a video or app is expected there. On macOS 27, make sure Include System Audio is checked.
3. Check Screen & System Audio Recording permission. Choose Apple menu > System Settings > Privacy & Security > Screen & System Audio Recording. Turn the app on. Apple notes you can allow an app to record the screen and audio, or just audio. See Apple’s permission guide.
4. Check Microphone permission. In Privacy & Security, click Microphone and turn on the app that records. See Apple’s microphone guide.
5. Quit and reopen the app. After you change a permission, restart the recording app before you try again.
6. Make a short test. Record ten seconds, play it back, and listen. This catches the wrong mic before a long take.
7. Some apps block recording. Apple notes that some apps, such as the Apple TV app, might not let you record their windows.
FAQ
How do I screen record on Mac with sound from the computer?
On macOS 27 Golden Gate or later, press Shift-Command-5, click Options, and choose Include System Audio. On macOS 26 Tahoe or earlier, use an app that captures system audio, such as OBS (free), MacMuse Recorder, Cap or Screen Studio.
Does QuickTime record internal audio on Mac?
Not by itself. Apple’s QuickTime steps offer only a microphone. On current macOS, File > New Screen Recording opens the Screenshot toolbar, which has Include System Audio on macOS 27 or later.
Why does my Mac screen recording have no sound?
Usually the microphone is set to None, system audio isn’t supported on your macOS version, or the app lacks permission. Check Options in the Screenshot toolbar, then System Settings > Privacy & Security > Microphone and Screen & System Audio Recording.
Where do Mac screen recordings save?
By default, on your desktop, as .mov files named “Screen Recording” with the date and time. Change this under Options > Save to in the Screenshot toolbar.
Can I record my voice and system audio at the same time?
Yes. On macOS 27, choose a microphone and Include System Audio in the same Options menu. On older macOS, OBS, MacMuse Recorder, Cap and Screen Studio can all record both.
Next step
If you want mic and system audio plus editing in one app on macOS 15 or later, see how MacMuse Recorder records and edits screen videos. It costs $19.99 once for one Mac. If you are still choosing, compare it with others in our Screen Studio alternatives roundup or our guide to the best screen recorder for Mac.
Get new MacMuse apps first
A short email when a new app ships or an app gets a big update. That’s it.